Adding annotations to documents
You can add annotations to Microsoft Office documents, Adobe PDF documents and image files. You get annotation options when you preview a document.
-
In Objective Connect, go to the document’s Preview page within your workspace.
Go to the workspace then the folder if necessary; select the document to open its Preview page.Note: If you are using Microsoft Edge, you must click on to view the annotation toolbar options.
-
The following toolbar options are available for you to annotate:

-
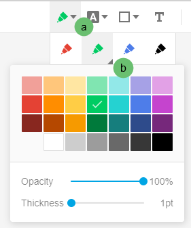
To customise annotations before adding them to the document, select the right arrow next to them and then (if applicable) select the bottom-right corner. For example:
- Select the first tab (a) to pick a colour.
- Select the second tab (b) to pick a different colour.

-
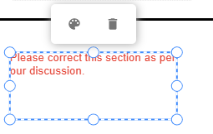
To customise annotations after adding them, select the annotation and click . For example:

I want to ...
Then ...
Mark with freehand tools
Select
 to start marking the document. You can pick a different colour and/or set the line thickness and opacity.
 Highlight text
Select
 and highlight text. Similar to the freehand text, you can pick another highlight colour.
 Underline or strikeout text
Click on the drop-down arrow next to
 and select an option:
-
 to underline text
 -
 to draw a squiggly line under the text
 -
 to strikeout text.
Draw a shape
Select the drop-down arrow next to
 and pick a shape to draw in the document.
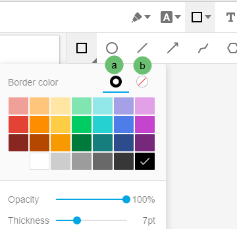
To change the shape colour and/or set a different line thickness:
- Select the first tab (a) to pick a shape border colour.
- Select the second tab (b) to pick a shape fill colour.

To draw a shape without border or a shape without fill, pick
 for border colour and fill colour respectively.
Add a text box
Click
 and draw a text box in the document.
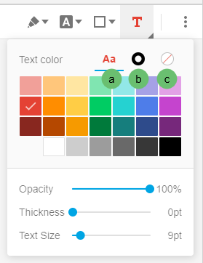
 In addition to changing the text box border and fill colours, you also have the option to set the text font colour and size.

-
-
When you have finished, click Annotate at the top of the page and select either or . The Public option is available only when your workgroup owner has enabled it for your workspace.
Public annotations will be visible to other participants.
You can change a private annotation and make it public or make a public one as private. To do this, in the Annotation pane, select and then or . Additionally, a workspace owner can set a participant's public annotation as private.
Note: You are unable to add annotations to offline documents.
-
In Objective Connect, go to the document’s Preview page within your workspace.
Go to the workspace then the folder if necessary; select the document to open its Preview page. -
Select .
The following toolbar options are available for you to annotate:

To customise annotations after adding them, select the annotation and click .
I want to ...
Then ...
Mark with freehand tools
Select
 to start marking the document. You can pick a different colour and/or set the line thickness and opacity.
 Highlight text
Select
 , pick a colour to highlight text. Similar to the freehand text, you can pick another highlight colour.
 Underline or strikeout text
Select
 and select an option:
-
 to underline text
 -
 to draw a squiggly line under the text
 -
 to strikeout text.
Draw a shape
Select
 and pick a shape to draw in the document.
Select it again to change the shape colour and/or set a different line thickness
Add a text box
Click
 and draw a text box in the document.
 In addition to changing the text box border and fill colours, you also have the option to set the text font colour and size.
-
-
When you have finished, select Annotate at the bottom of the screen and then choose either or . Public annotations will be visible to other participants.