Customising a workgroup
-
You have to be an Enterprise admin to customise User Interface (UI) elements such as the Action button at a workgroup level.
-
If you are a participant of workspaces owned by two or more workgroups, based on what you select from My Workspaces, respective theme and UI elements are displayed.
-
If a user logs in using the customised workgroup URL that you shared, they can see both customised login page as well as customised workgroup / workspace changes (after they select a workspace from the home page). Whereas, if they login directly to Objective Connect, they can only see customised workgroup / workspace changes but not the customised login page.
-
Customised workgroup URL that you share with your users is unique to each workgroup. This ensures that there is no overlap between customised settings of different workgroups.
As an Enterprise admin you can customise UI elements at a workgroup level:
For more information, see this blog post.
-
In Objective Connect, select your username in the top right-hand corner of the page and choose the option from the drop-down menu.
Workgroups in the Enterprise are displayed.
-
Select the workgroup you want to customise and select
 .
. - Select Customise Workgroup.
-
Only special character allowed in the workgroup URL is hyphen.
-
Can edit the workgroup URL any number of times.
-
entering the colour's hexadecimal code/name, RGB value or CSS literal value.
-
using the colour box.
-
using the colour picker from colour box to pick any colour on the page.
-
Select
 for more information about logo images.
 -
Supported formats are PNG, SVG, JPEG and GIF. Whereas, recommended format is PNG.
-
Maximum allowed size is 400 KB.
-
Invalid file types are not supported.
-
Current image is displayed when there is an already published image. You can select Choose Image to replace it with a new image.
-
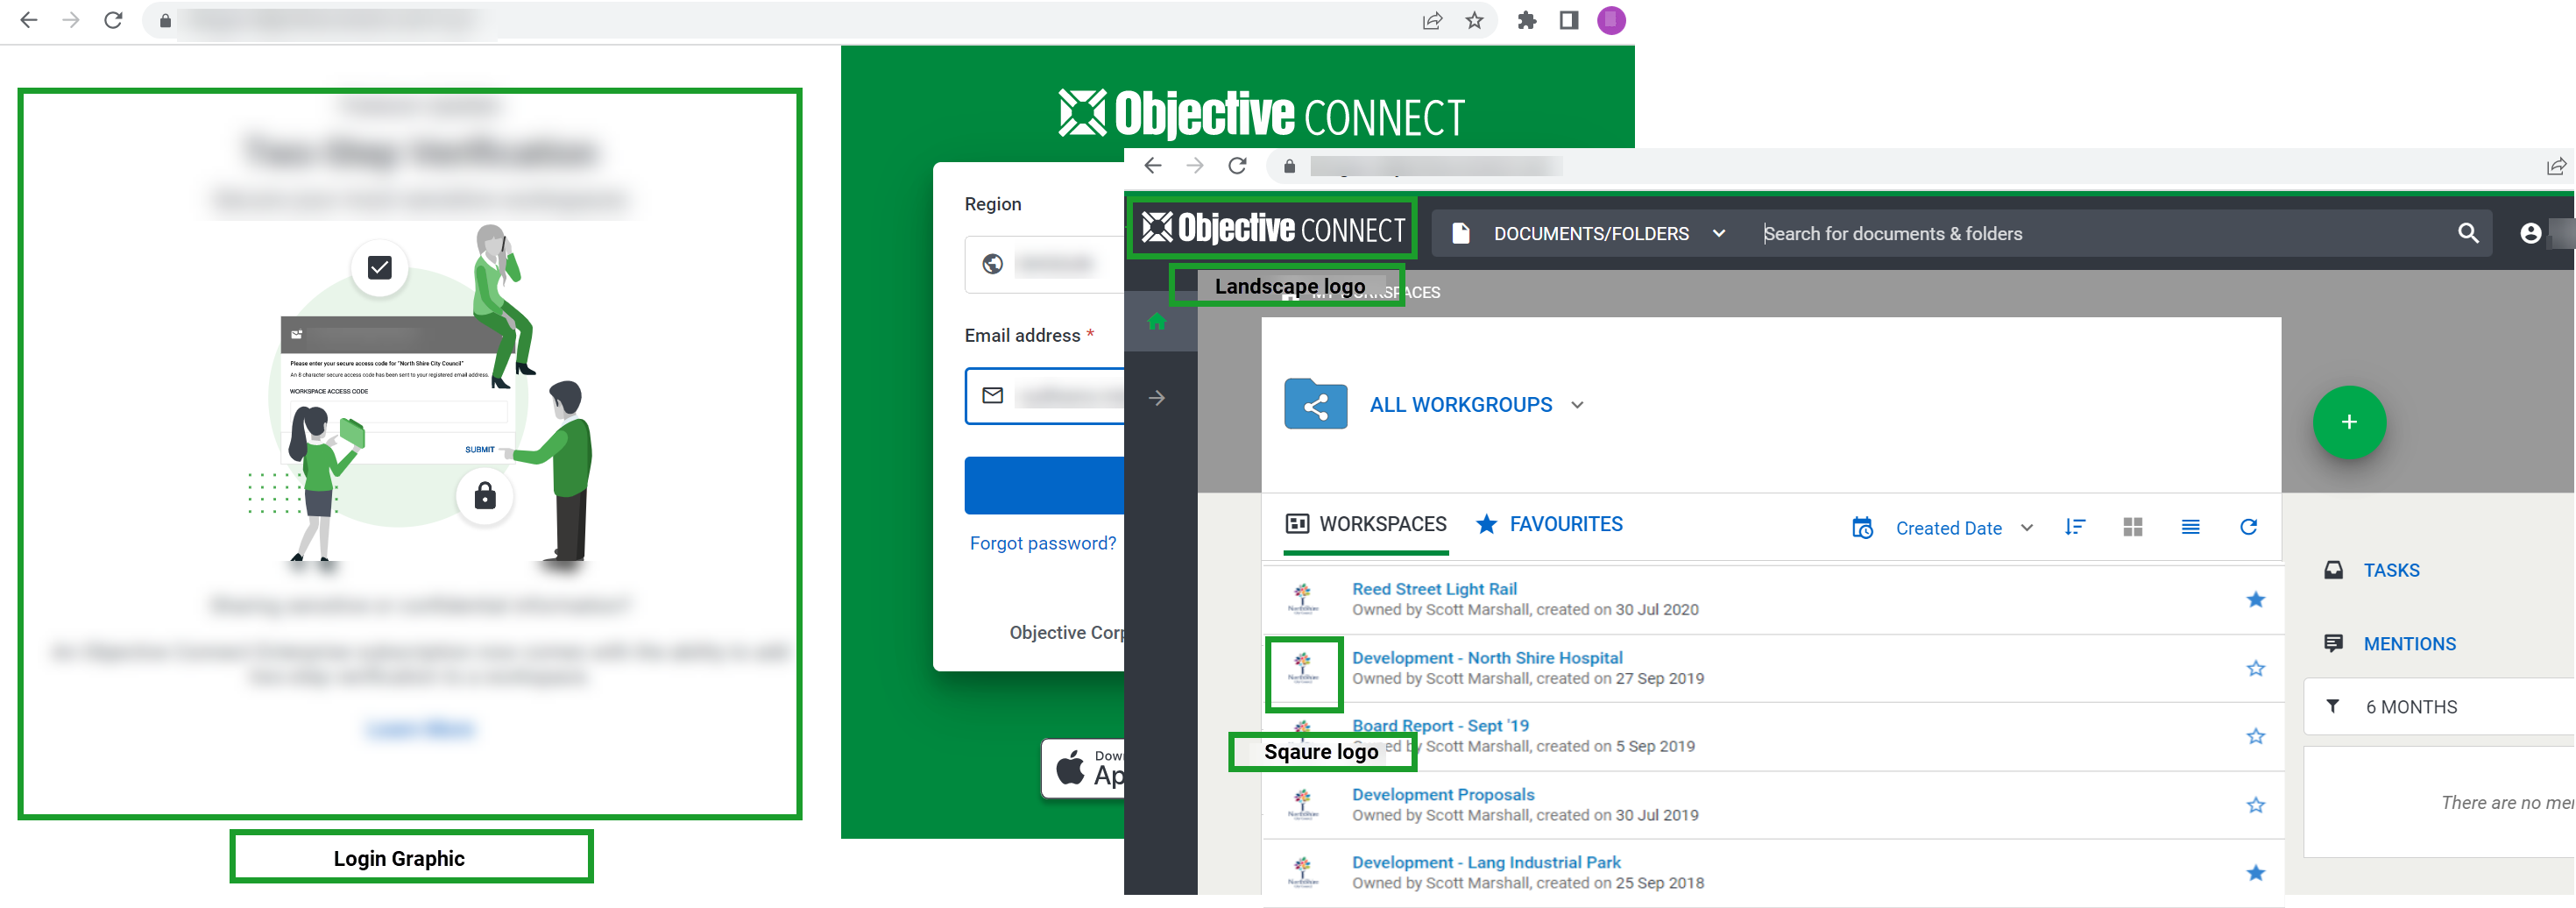
Landscape Logo
-
Square Logo
- Select Publish to save everything and upload your changes. After publishing, refresh your workgroup / login pages to see your customised settings.
The Customise Workgroup page is displayed. You can customise the following settings for your users.
|
Settings/Action
|
Description |
Additional Information |
|---|---|---|
|
Workgroup URL |
Customised workgroup URL that you would like to be displayed in your emails and invitations when a workgroup is shared. Enter your workgroup URL in the displayed field. Select to remove the last saved workgroup URL. |
|
|
Brand colour |
The colour theme you want to apply to your workgroup in Objective Connect's user interface. As soon as you enter / select the colour, it is applied (but not saved) to the workgroup's user interface elements. |
You can select the colour by: Tip: You can use colour picker to select the exact colour of your logo and make it your theme. |
|
Workgroup Logo |
Your organisation's logos that represent your workgroup in Objective Connect's UI. |
Note: All the uploaded images will be scanned for viruses. In case of a detection, uploaded image is removed and last saved image is retained. A warning message is also displayed. |
|
|
By default, this is Objective Connect logo that you can see on the top left-hand corner of your Customise Workgroup page. Select Choose Image to upload a new landscape logo. Select to remove the uploaded landscape logo image and retain last saved image. |
|
|
|
Workgroup / workspace logo that is displayed in My Workspaces. Select Choose Image to upload a new square logo image. Select to remove the uploaded square logo image and retain last saved image. |
|
|
Login Graphic |
Advertisement that can be seen on the left-hand side of a user's login page. This is displayed to all workgroup users prior to logging in. |
|
|
Clear Changes |
Removes unsaved customisation changes. |
|
|
Delete Customisation |
Deletes the saved customisation. |
|
|
Preview Login Page |
Preview your customisation settings. After selecting brand colour and uploading logo images, select to see the preview in the login page. |
Close the preview window to go back to your customisation settings. |